Follow our instructions to find out how to make animal and other natural history inspired paper snowflakes.
We have 10 free templates for you to download and print, and tips on making your own designs.
You will need
- a printed out A4 template (see the 10 designs below the instructions)
- a ruler to make crisp, well-creased folds
- scissors
- fine scissors to cut small details
- a flat surface
- Blu Tack or similar putty to help make small cuts
- adult supervision when using sharp scissors
Folding the snowflake template
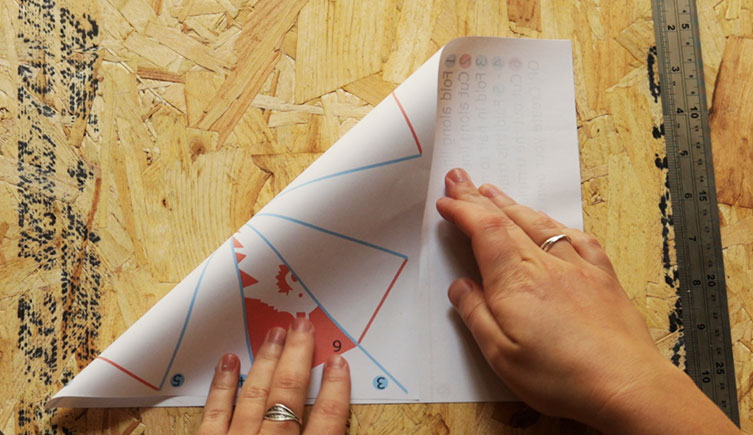
1. Turn the template over and fold it diagonally in half along the blue line labelled ‘1’.
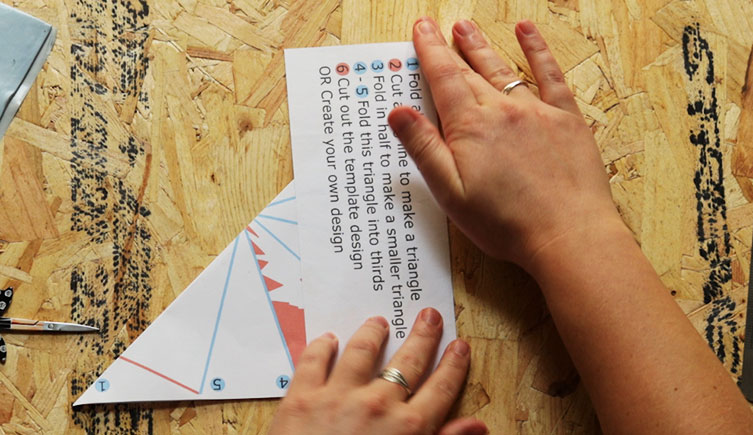
2. Fold and remove the rectangular flap with the instructions on, along the red line labelled ‘2’.
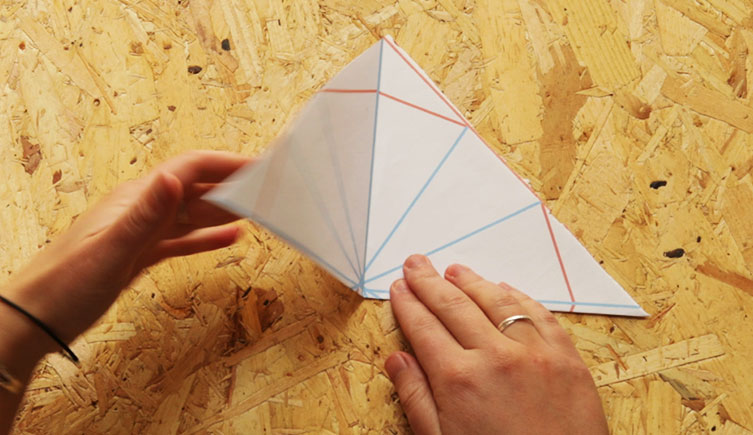
3. Place the paper design face down and fold the large triangle in half along the blue line labelled ‘3’.
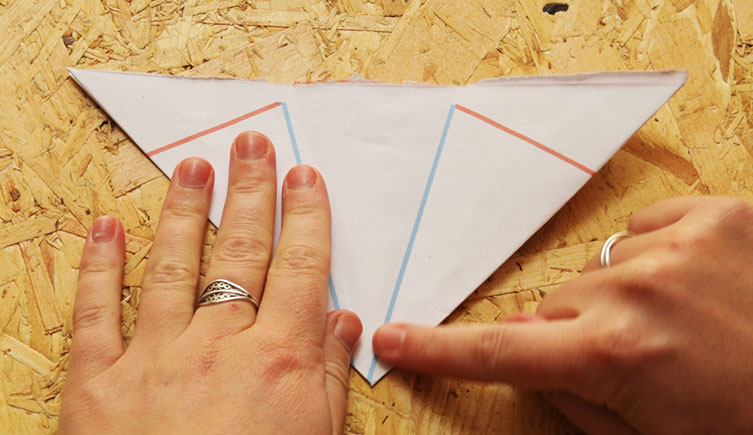
4. Place the paper design face down, with the long edge of the triangle pointing away from you.
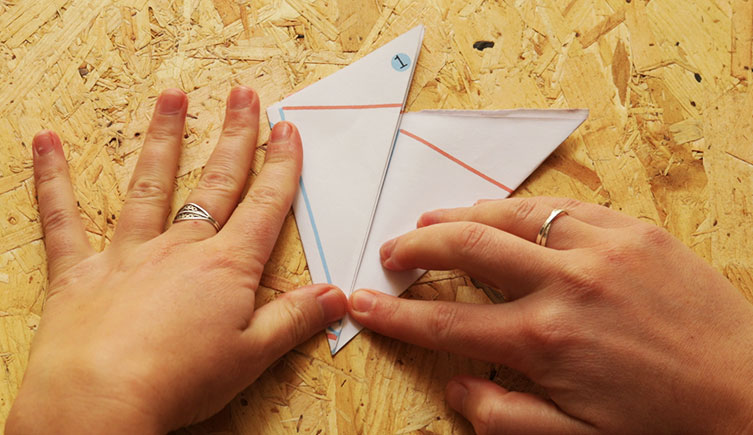
5. Fold the left edge of the paper to meet the right-hand blue line.
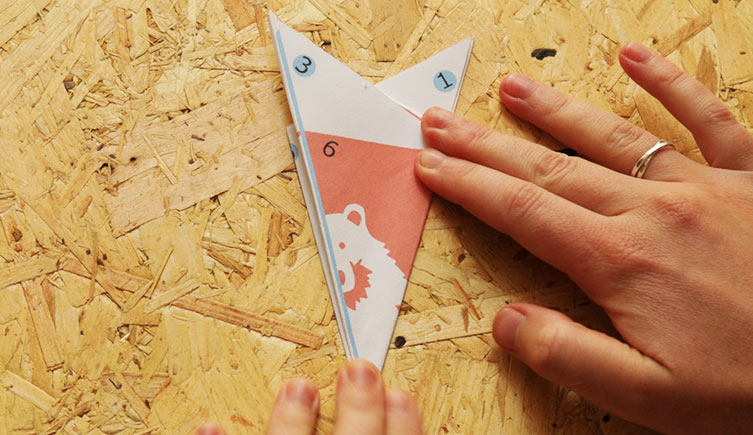
6. Fold the right edge of the paper to meet the left-hand blue line, so the design is on top.
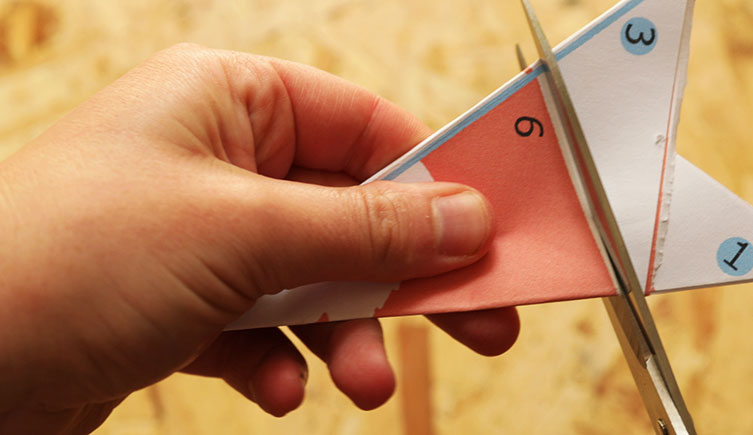
7. Cut along the top – along the red edge labelled ‘6’ – to create a triangle.
Cutting the snowflake design
8. Cut away the red areas of the design using fine scissors.
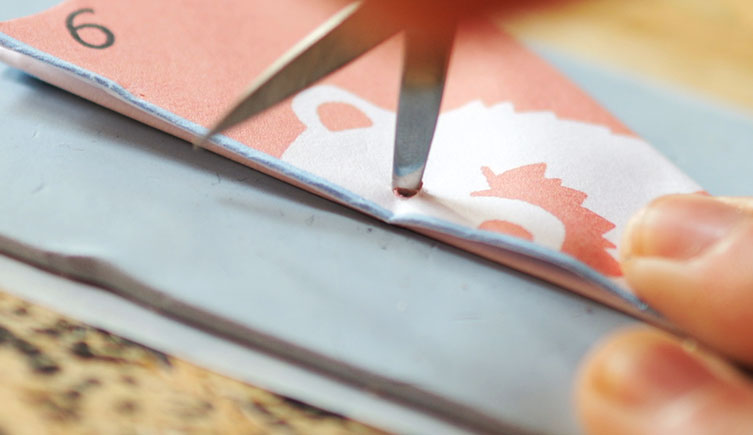
9. Do the internal areas first. You can place Blu Tack or similar putty behind the paper to help you safely make small cuts.
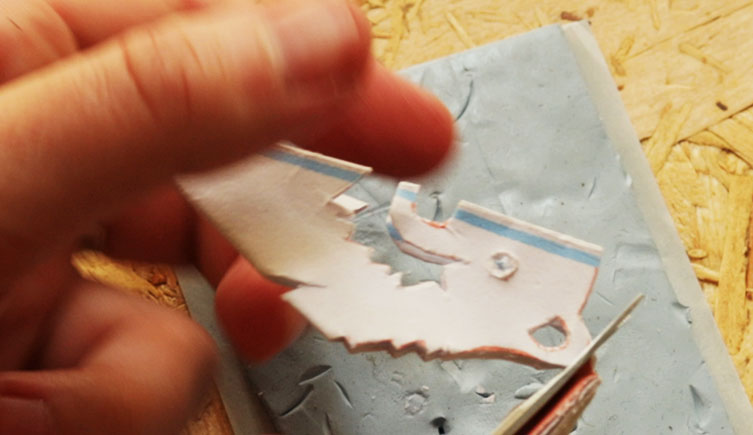
10. Do external areas last.
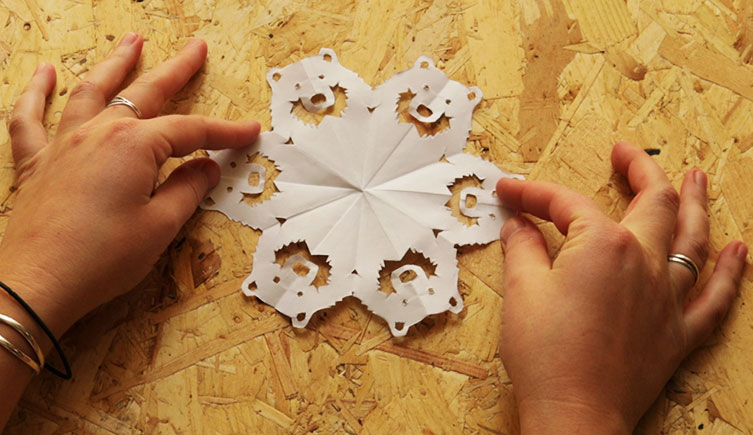
11. Your snowflake is finished! Fold out your design and decorate your windows or walls.
Snowflake templates you can download
Tips on making your own paper snowflake designs
Fancy having a go at making your own snowflake designs? Scientist and craft fan Alex McGoran, who designed the templates for this article, has some tips:
- Start simply to get an idea of what’s possible. You can study the above templates to get a feel for how the process works.
- Fold a snowflake – you can use this blank template – and then draw on one of the blank sections.
- Begin experimenting by cutting out triangles and diamonds to make geometric snowflakes.
- When you feel ready to move on, start with a general sketch of the creature, plant or other design that you want to make.
- Try to simplify your animal into distinct shapes and remember that less can be more – you don’t want to cut away too much paper and have your snowflake fall apart.
- Small shapes can add texture. For example, triangles can be used to add fur to an animal, such as in the polar bear template. If you make a fish or pangolin, you may wish to add a few scales with crescent shapes. You don’t need to add this texture to the whole snowflake, just in a few choice places.
- Draw in the shapes on the template that will create your desired design.
- Colour in the areas you want to cut out. This makes it easy to see what you still need to cut. It will also highlight if you’ll lose parts of your design by cutting too much away and leaving them unsupported by any paper.
- Start to cut out the parts you’ve coloured in. Take a conservative approach – you can unfold the design to see how it’s working.
- Cut out smaller details first – the paper gets a lot floppier once you have cut out large chunks.



Don't miss a thing
Receive email updates about our news, science, exhibitions, events, products, services and fundraising activities. We may occasionally include third-party content from our corporate partners and other museums. We will not share your personal details with these third parties. You must be over the age of 13. Privacy notice.
Follow us on social media