
We are continuously looking to increase the biodiversity of our living exhibition of habitats and wildlife within its current confines and, with green roofs in mind, we asked Paul Richens for advice. "Start small," were his good words! Our first green roof was created in 2009 on our smallest shed using meadow turfs. This was extended two years ago, over our adjoining log store, resulting in a small raised meadow area visible from the Darwin Centre courtyard.

The meadow roof in spring...
© Jonathan Jackson

...and in summer.
© Jonathan Jackson
Our meadow roof is a mix of wildflowers including red clover (Trifolium pratense), oxeye daisy (Leucanthemum vulgare), lady's bedstraw (Galium verum) and grasses such as Yorkshire fog (Holcus lanatus), red fescue (Festuca rubra) and smooth meadow-grass (Poa pratensis). The roof is slightly pitched preventing waterlogging but flat enough to hold the substrate, making it ideal for this plant community.
We treat it as a meadow, with a cut in early spring, and again in late summer. It has just been cut by our volunteer Tommy who has returned to help us before leaving for further study in Oxford.
The next step was a 'green' cover for the pitched roof of our new sheep shed - Larissa Cooper took up this challenge and tells us how:
Last year we created an additional habitat in the Wildlife Garden. Not another woodland, or grassland, but a living roof on top of the shed our sheep sleep in. Our latest green roof was created in November 2013.

The sheep shed roof before we added the green roof.
© Jonathan Jackson
It has a slight pitch so water will drain away a lot quicker than a flat roof which was a big consideration when designing the new living roof. The shed builders had provided a roof strong enough to support vegetation. We wanted a roof which would require little watering, be beneficial for invertebrates, and aesthetically pleasing and looking at it now, I think we may have achieved this!
Collaborating with information and tips from Living Roofs and two books: 'Building Green - a guide to using plants on roofs, walls and pavements' by Jacklyn Johnston and John Newton and 'Planting Green Roofs and Living Walls' by Nigel Dunnett and Noel Kingsbury, this is how we did it:
The roof comprises eight layers: (from bottom to top), with layers 2 to 6 depicted in the photograph that follows.
- roof top
- geotextile
- butyl rubber
- geotextile
- recycled ridged foam
- fleece
- substrate
- plants
+-+L.+cooper.jpg)
Layers added between the roof below and the substrate and plants on top.
© Larissa Cooper
- Step 1 - We added layers 2-4 which will act as a waterproof membrane, protecting the roof surface from any possible water or root damage. These layers overlapped the roof and were trimmed at the end.
- Step 2 - We fixed the wooden framework to the edge of the roof to hold in all the materials.
- Step 3 - We added the recycled foam in layer 5 which helps to drain away any water via the ridges underneath, but also retains moisture, minimising the watering needed.
- Step 4 - On top of the foam we used wool fleece for layer 6. This layer will retain moisture, but also acts as a root barrier to the other layers, preventing the plants damaging them. The fleece is made from wool which will eventually break down and become part of the substrate.
- Step 5 - before adding the substrate we inserted crossbeams and fixed them to the outer frame. These beams will be covered by vegetation, but prevents the substrate from slipping in wet weather.
- Step 6 - Time to add the substrate. Ours comprises poor quality topsoil (subsoil is preferable), mixed with gravel and crushed brick and aggregates. But you could use a number of different materials here from crushed brick and aggregates, compost, even clay balls. If planting wildflowers and wanting to attract invertebrates, the lower the quality the better!
If you are making a living roof at home, you can use old blankets for the fleece layer, and polythene for the waterproofing. A living roof can be created on a budget with a bit of planning and a few freecycle posts!
.jpg)
We planted the roof in November with a mixture of sedums and coastal plants. The plug plants tended to do better than the potted plants.
© Jonathan Jackson
- Step 7 - Finally, the planting. We selected combination of sedums: English stonecrop (Sedum anglicum) white stonecrop (Sedum album), biting stonecrop (Sedum acre) and reflexed stonecrop (Sedum rupestre); and coastal cliff plants: rock sea-lavender (Limonium binervosum), sea campion (Silene uniflora), thrift (Armeria maritima) and Jersey thrift (Armeria arenaria). These plants are drought tolerant, and also rich in nectar which will help to attract the insects.

The roof just after planting and with the layers still needing to be trimmed
© Jonathan Jackson
The plants adapted well to their new habitat.

From this...
© Jonathan Jackson

...to this in just 8 months! Here you can see the sedums, rock sea lavender and thrift in flower (along with a lonesome poppy which found its own way there).
© Jonathan Jackson
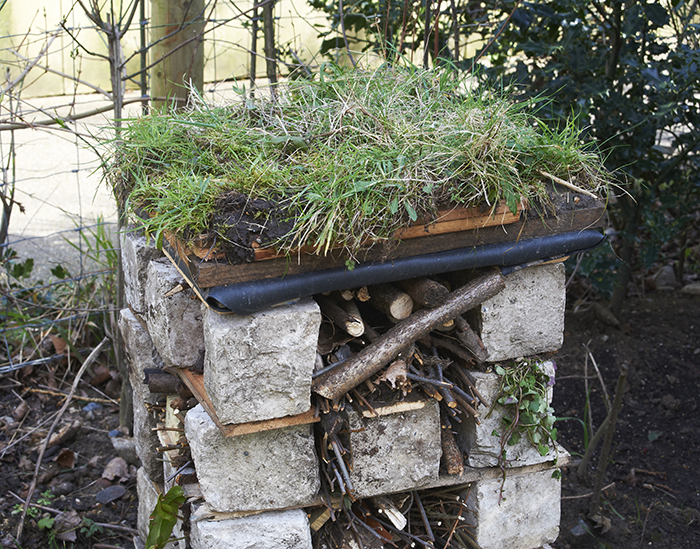
We also added a small log pile and a brick pile to create added niches for invertebrates to shelter in.

Log pile made from a selection of small logs which will hopefully attract some beetles and woodlouse.
© Larissa Cooper
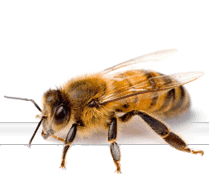
Nine months on and the roof is in bloom, with the stonecrops and rock sea lavender in flower. Bees have been seen foraging for nectar and we will shortly be carrying out a more in-depth invertebrate survey.
Living or 'green' roofs are becoming more popular in the UK, but they are not a recent trend. In Europe, Germany leads the way as the country with the most living roofs. London's green roof guru, Dusty Gedge, estimates that in London alone, there is potential for 1,000 hectares of surface area to be "greened" - that's around 7 more Hyde Parks or around 2,400 more Museum Wildlife Gardens! If you think that we have recorded over 2,500 species of plants and animals here in the Garden you can see that the implications for installing green roofs can have nothing but a positive impact on our native wildlife.
Living roofs are not only great for wildlife, they can also offer environmental protection against floods, reduce heat loss and the heat-island effect in cities and also add insulation. There are many different designs of living roof and almost any roof can be converted so long as it can bear the load. I can recommend you taking a look at Living Roofs if you would like to explore doing so in further detail.

Nine months on and plants are well established on our new roof.
© Jonathan Jackson
Inspired by the sheep shed and making use of the cut-offs we made a mini roof for our insect hotel.
© Jonathan Jackson
Our new roof has added not only to the biodiversity of the garden with additional plant species, but also looks rather beautiful too. Now if only my landlord would let me loose on the garage at home...
Thank you Larissa - your landlord shouldn't need too much persuading once they see the work you've done here! And to close, here's one more image from our beautiful new roof.
.jpg)
Thrift (and self-sown clover) amongst the sedum today.
© Naomi Lake