Moulding the Statue
Sculptor Anthony Smith writes:
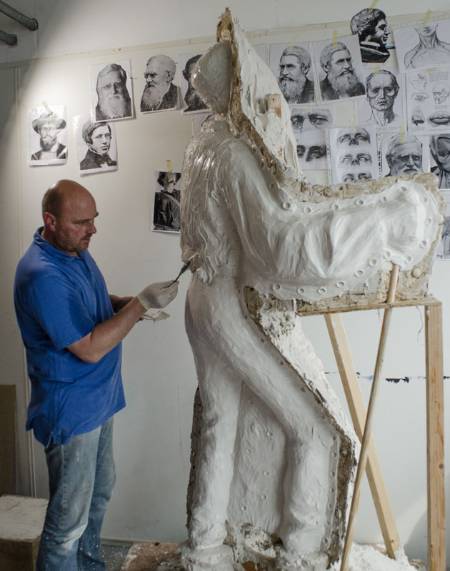
During the past couple of months I have been putting the finishing touches to the clay sculpture of Wallace, and we have now finally finished making its all-important mould. Taking a mould of a large, immovable object, such as a clay statue, is a rather complex operation, but hopefully these photos will help to explain exactly how we went about it...
The front and back of the statue are moulded separately, so the first step involved creating a dividing line all around the edge of the statue (above). This was done by building up a wooden support behind the statue, then adding a clay wall along the dividing line. Chalk powder is put on the surface of the clay statue first so that the clay wall can be removed without damaging the surface of the statue itself.
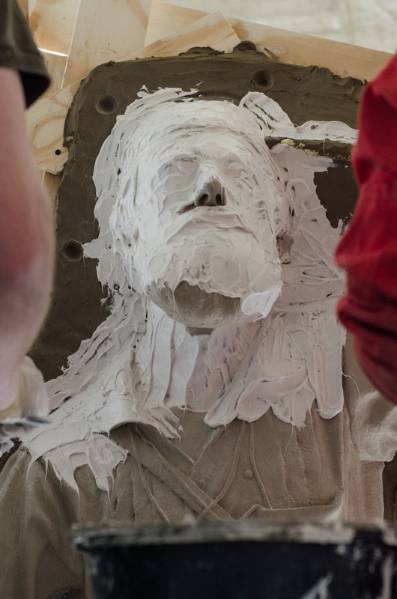
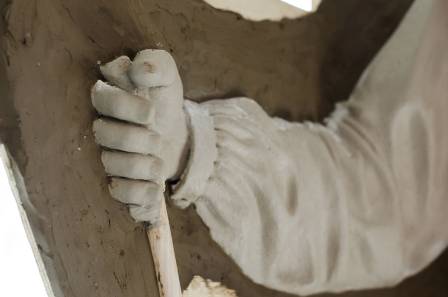
Once the clay wall has been added it is time to start coating the front side of the statue with a layer of silicone rubber (above). This is a fantastic material for mould-making as it can be easily applied to almost any surface, capturing the tiniest of details in the original sculpture (right down to the sculptor's fingerprints!).
Above you can see the front of the statue, with the wooden support behind and some of the clay wall still visible. The whole front and base of the statue is coated in a thick layer of white silicone rubber. The circular dents that you can see in the rubber are there so that the rubber sits correctly in the plaster casing... see below.
 Preparing the plaster.
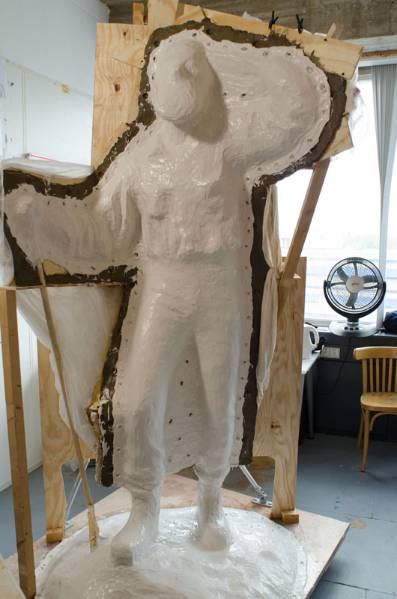
Above you can see that the first section of the plaster casing has been added, encasing the base of the statue. Wooden supports are included within the plaster to add strength.
Once the whole of the front of the statue is encased in plaster it is time to work on the back (above) – the wooden support and the clay wall are removed and a layer of rubber is added over the top of the clay, just the same as for the front.
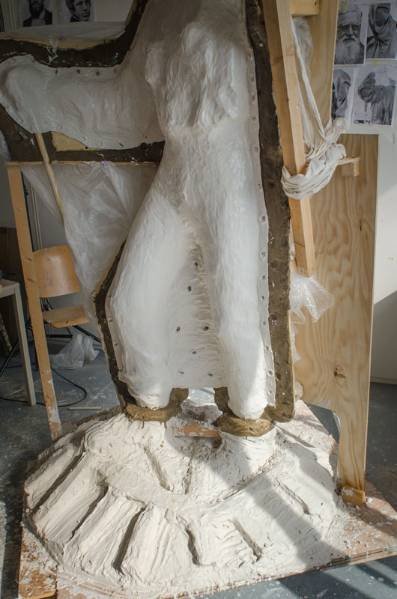
Once the rubber on the back of the sculpture has fully set, it too is enclosed with a plaster casing. Only once the plaster has fully dried is it time to take the mould apart...
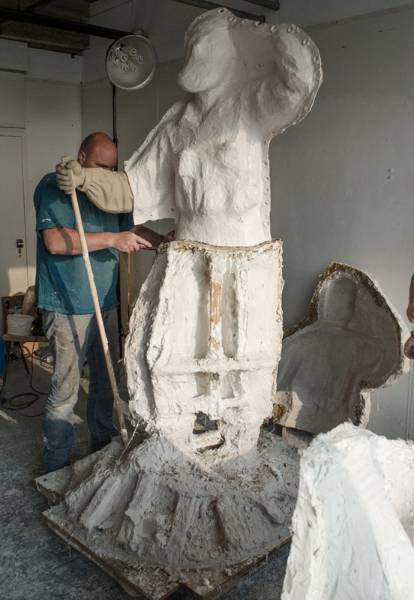
First, the various parts of the plaster casing are prised off (above - you can see one of these parts leaning against the wall behind the statue). Then the rubber is peeled from the surface of the clay and laid back inside the plaster casing. This way the rubber holds the exact same shape as it did when it was on the surface of the statue and an accurate replica can be made. Finally, the moulding is complete!
So what next? Well, the mould is currently at the foundry where they are busy creating a hollow wax replica of the statue. Next week I will be joining the foundry to put the finishing touches to this replica, then we will move on to the 'investment' and casting stages.
If you're already curious to learn exactly how the mould is used, here's a good summary of the lost-wax casting process.
My next update will be coming from the foundry... stay tuned!